Hey Nailbot Creative!!
Want to learn how to Nailbot like a Pro?! Well you came to the right place! We're spilling all our secrets and letting you in on our best insider Nailbot tips & tricks!
✨CUSTOMIZE YOUR ART✨
Flip & Rotate (in iOS)-
1. Tap the right arrow from the AR Screen.
-
2. Tap the arrows to flip your art horizontally or vertically.
-
3. Tap the circle arrow to rotate your art 90, 180, 270, or 360 degrees.

✨GET BETTER PRINT QUALITY✨
Adjust Ink Setting
-
1. Tap the right arrow from the AR Screen.
-
2. Toggle between 1 or 2.
-
3. Select Save.

✨NAILBOT PRIMER✨
Pat, Shake, & Roll Primer
-
1. Pat the primer against the palm of your hand.
-
2. Rotate the primer between pats to ensure all clumps are loosened.
-
3. Shake the primer for 10-15 seconds.
-
4. Roll the primer between both palms for 30 seconds. (Think of rolling play-doh between your hands to make a snake)

✨NAIL PLACEMENT IN NAILBOT✨
Keep Nail Bed Flush with Finger Guide
-
1. Align the bottom of your nail bed with the bottom of the Finger Guide.
-
2. Make sure the Finger Shield is up.
-
3. Keep all other fingers including the thumb below the Finger Guide and Finger Shield.

✨PRINT & SEAL ON COLORED POLISHED & PRESS ONS✨
2 Coats of Top Coat on Colored Polish
-
1. After priming and printing, apply one layer of Top Coat on colored polish.
-
2. Primer will begin to turn transparent.
-
3. Apply a second layer of Top Coat over the first.
-
4. Primer should fully disappear.
✨TEST PRINTS ON PAPER✨
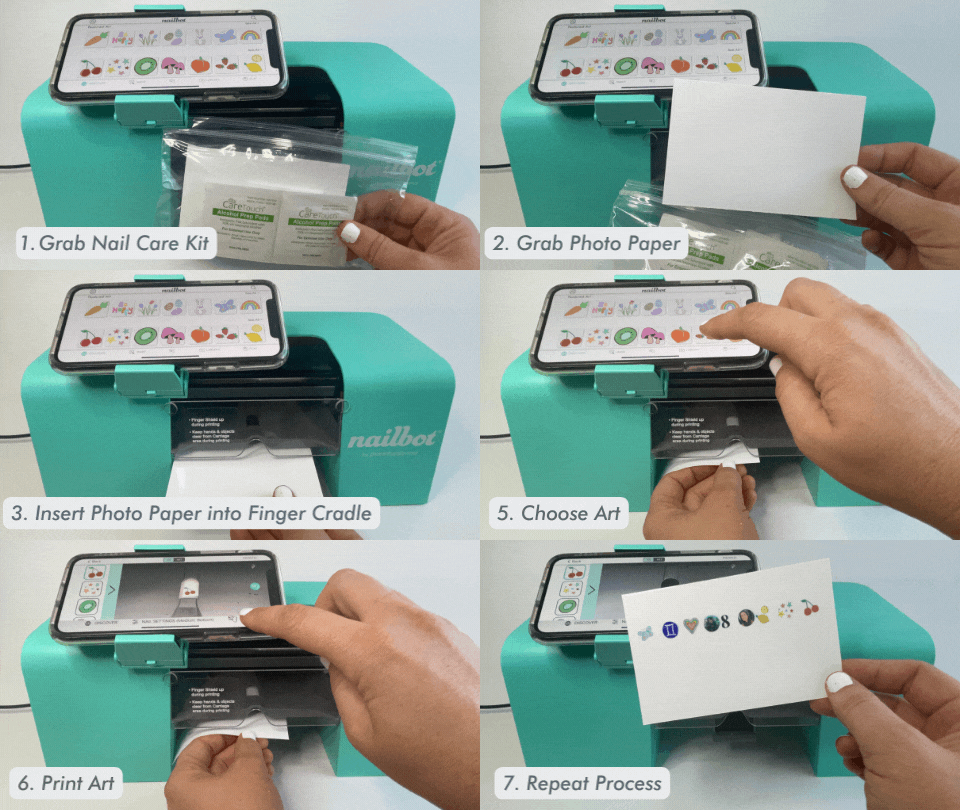
Use Paper to Test Prints before Printing on Nails
-
1. Grab a piece of photo paper from Nail Care Kit. You can also use a notecard or other paper.
-
2. Slide the photo paper into the Finger Cradle as you would for your finger.
-
3. Select the test print and tap print.
-
4. Move the photo paper between each print so you don't print on top of another print.


